One Room Challenge // Kitchen Renovation Week 5
The home stretch, you guys. Week 5 of the One Room Challenge is here. If you are just popping in, I am participating in the One Room Challenge, an awesome blogger challenge where several hundred bloggers, including 20 headliners document the makeover of a space in 6 weeks. I am updating my mom’s kitchen. Catch is, my mom lives 2 and a half hours a way, so I am basically doing the entire job in four long weekends. Things are going pretty well, though there are a bunch of little finishing items left to tackle and only one day I can make it over there to finish, style and shoot. Here’s to a speedy finish!
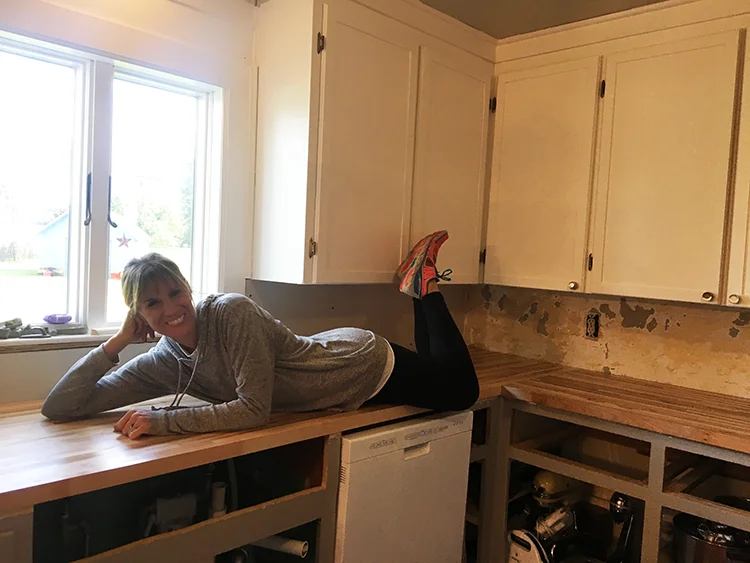
Last week I shared the dining half of the room, which is so so close to being done. This week I am getting a little more real, sharing all about the big parts of the job, the counter tops and the backsplash and the lessons I learned while installing for the first time.
First I’ll tell you about the countertops we chose. Butcher Block was really the only material I considered. Because of budget and ease of install, it was really the only choice. There are several wood choices when looking at butcher block. I knew I wanted maple, which is a light wood with yellow undertones, because it is cost effective and would look really pretty with the cabinet colors I choose.
I researched butcher block countertops from several major home improvement and flooring retailers. Home Depot (my go-to) was sold out of many options. Menards only had lengths up to 8’ and I needed at least 10’. My friend Bri just ordered hers from Floor and Decor, because she only had good things to say, I was planning to order from there, but it was going to take several weeks for them to come in, so I passed. Finally I found what I needed at Lumber Liquidators. It was a little tricky to order online, so I went into the store and placed the order with a real person. The were able to help me and found the two lengths I needed in stock at a location not far from my mom’s. Then I planned to have them delivered to my mom’s house because the 12’ length was way too long to fit into any of our cars. But ultimately we decided to save a little cash, rented a truck from Home Depot and picked them up ourselves.
Next let me tell you about the tile backsplash. I am in love with the handmade Cle tiles that are so perfectly imperfect. This terracotta beauty is the tile I really wanted to use for my mom’s kitchen. Even though my mom didn’t give me a specific budget, I knew almost $15 a sq/ft was out. I found nice alternative grey subway tile with some color variance and texture. And once I added the white grout, the look is just what I was going for.
In case you are curious, here is the sink I bought.
10 Things I Learned from Installing My First Counter Tops and Backsplash
Factory edges of butcher block counter tops may not be 100% straight or square. Check before making your cuts.
Start prepping early, you need to put multiple coats of sealer on your counter tops and they need 6 hours to dry between coats. I put on 5 coats of Watco Butcher Block Oil & Finish.
When using your circular saw to cut your counter tops, go for it, don’t pause, keep moving the saw forward and make the cut.
Put a line of painters tape where you plan on making your countertop cut, this will help prevent splits in the wood.
Measure all aspects of the sink - the spacing of the drawers next to the sink, how deep it is, the dimensions of the apron if there is one. All of it! I found a sink that was “pretty much” the same width of the sink we were replacing, and it was so so close to not fitting.
Tile spaces are harder to use than it looks, or maybe I am just a novice.
Don’t grout all the way down to the countertops. This was an oops for me and my mom has to remove before caulking.
There are several options when finishing a tile edge. We actually used two different edge finished. I was really nervous that it would look funny, but after seeing it, I’m sure I’m the only person who gave it a second thought.
Bullnose tile - a tile that coordinates with the main tile, but is rounded for a nice finish
caulking - cost effective and easy, but not always the cleanest.
metal edging - clean and minimal.
moulding
Do some research on the size of grout lines you like, aka the spacer size you need to buy. I first bought 1/4” spacers because I wanted slightly larger grout lines. Then once I started laying out, 1/4” was just too wide, I made an emergency trip to get 3/16” spacers. Yes, 1/16” makes a big difference.
Grouting hides a lot. As I mentioned, spacers are not as easy to use as they look, so things weren’t perfect, but once I grouted it all looks as good as perfect.
Week 1 | Week 2 | Week 3 | Week 4
Check out all my inspiration and products I’m using on my Pinterest board. And, click here to see the other participant's progress.


