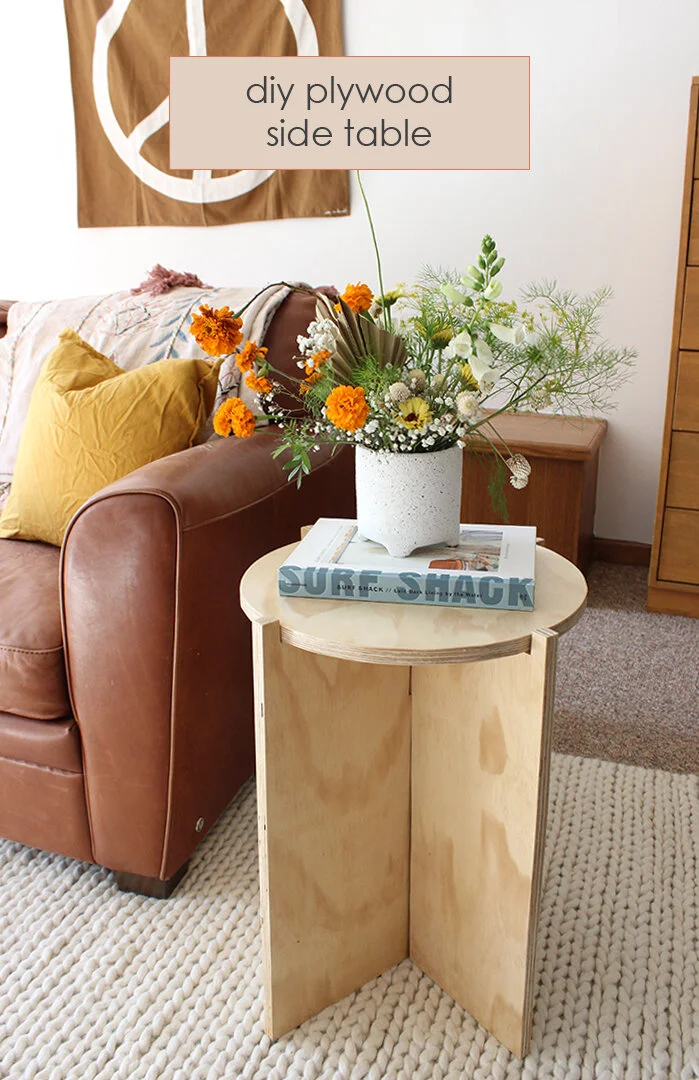
One Room Challenge Week 4 // DIY Plywood Side Table
It’s week 4 of the One Room Challenge and I am STILL painting! I have painted just about everyday since the start of this journey to upgrade my basement. The good news is the end is in sight, don’t want to jinx it, but tomorrow may be my last session with the paint brush! See where I’ve come from on week 1, week 2 and week 3.
A little more about the One Room Challenge, it’s a 6 week challenge where dozens of bloggers, including 20 featured bloggers, renovate a room and document their process on their blog and social media. The event happens twice a year, has grown to be quite a “thing, “ and is sponsored by Better Homes and Gardens. Check out all the other talented designer’s progress here.
Back to my project - The major painting is wrapped up, I am starting to put the room back together. This week I cleaned the carpet, assembled the Ikea cabinet I purchased and started installing the furniture. For this make-over I am trying to stick to a tight budget. I have shopped Facebook Marketplace, shopped my own home and I even made a table! I was inspired by this table from Urban Outfitters and had some plywood and all the supplies except the polyurethane on hand, so I went for it. And I am so happy with how it turned out!
SUPPLIES -
3/4” Plywood (I used birch)
Here are the plans and dimensions I used. If you’d like to make bigger or smaller, you can adjust accordingly. Please note that the drawing is not to scale.
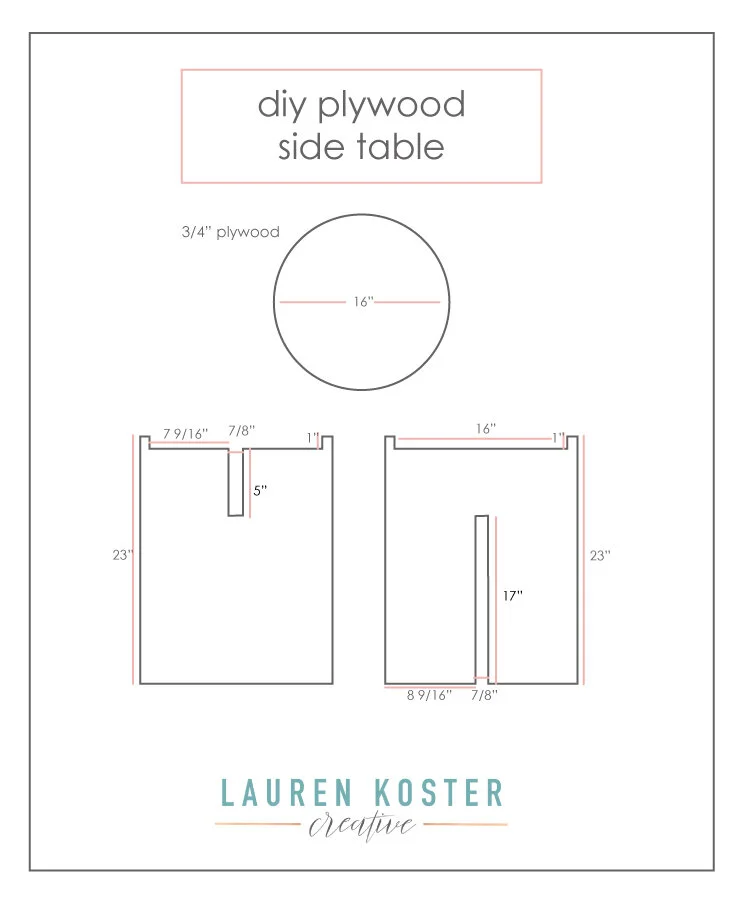
Trace a round object the size of your desired table top onto your plywood. I used a serving tray. You could use a pizza pan or a large serving bowl.

2. Use the jigsaw to cut out the table top.

3. Use the framing square to draw out the table base on your plywood. Cut the outer edges with a circular or table saw.

4. Use the jigsaw to cut the notches. You will need to drill a hole to start the cut with the jigsaw for the cuts that are not along an outer edge.

5. Use the electric sander to round out the edges of the circle and smooth the edges of the base. Once cut, assemble table to be sure pieces fit together before sanding. I had to shave off some places to fit together.

6. Use a fine grit sanding block to smooth surfaces.
7. Use a paintbrush to coat with polyurethane. Wait until completely dry, give a quick fine grit sanding and apply another coat.

8. Assemble table, put base together and set round top into base!

flowers by Cass and Jean Flower Co.
What is still left to do -
finish decorating
organize toys
special project for Oliver
SHOP THE POST


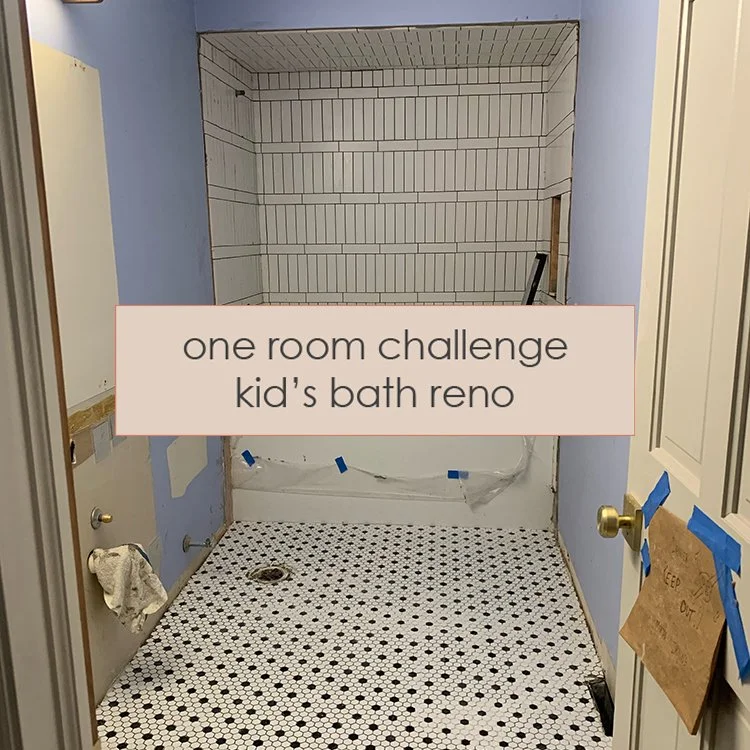


We made it! Another One Room Challenge in the books! I am just so happy with how this bright and modern kids bath turned out! Started from a dated 80’s bathroom with a blue formica countertop and carpet and gave her a major glow-up in the form of a complete renovation. Now - classic selections with a special layer to make it a happy, updated space for my kiddos.